
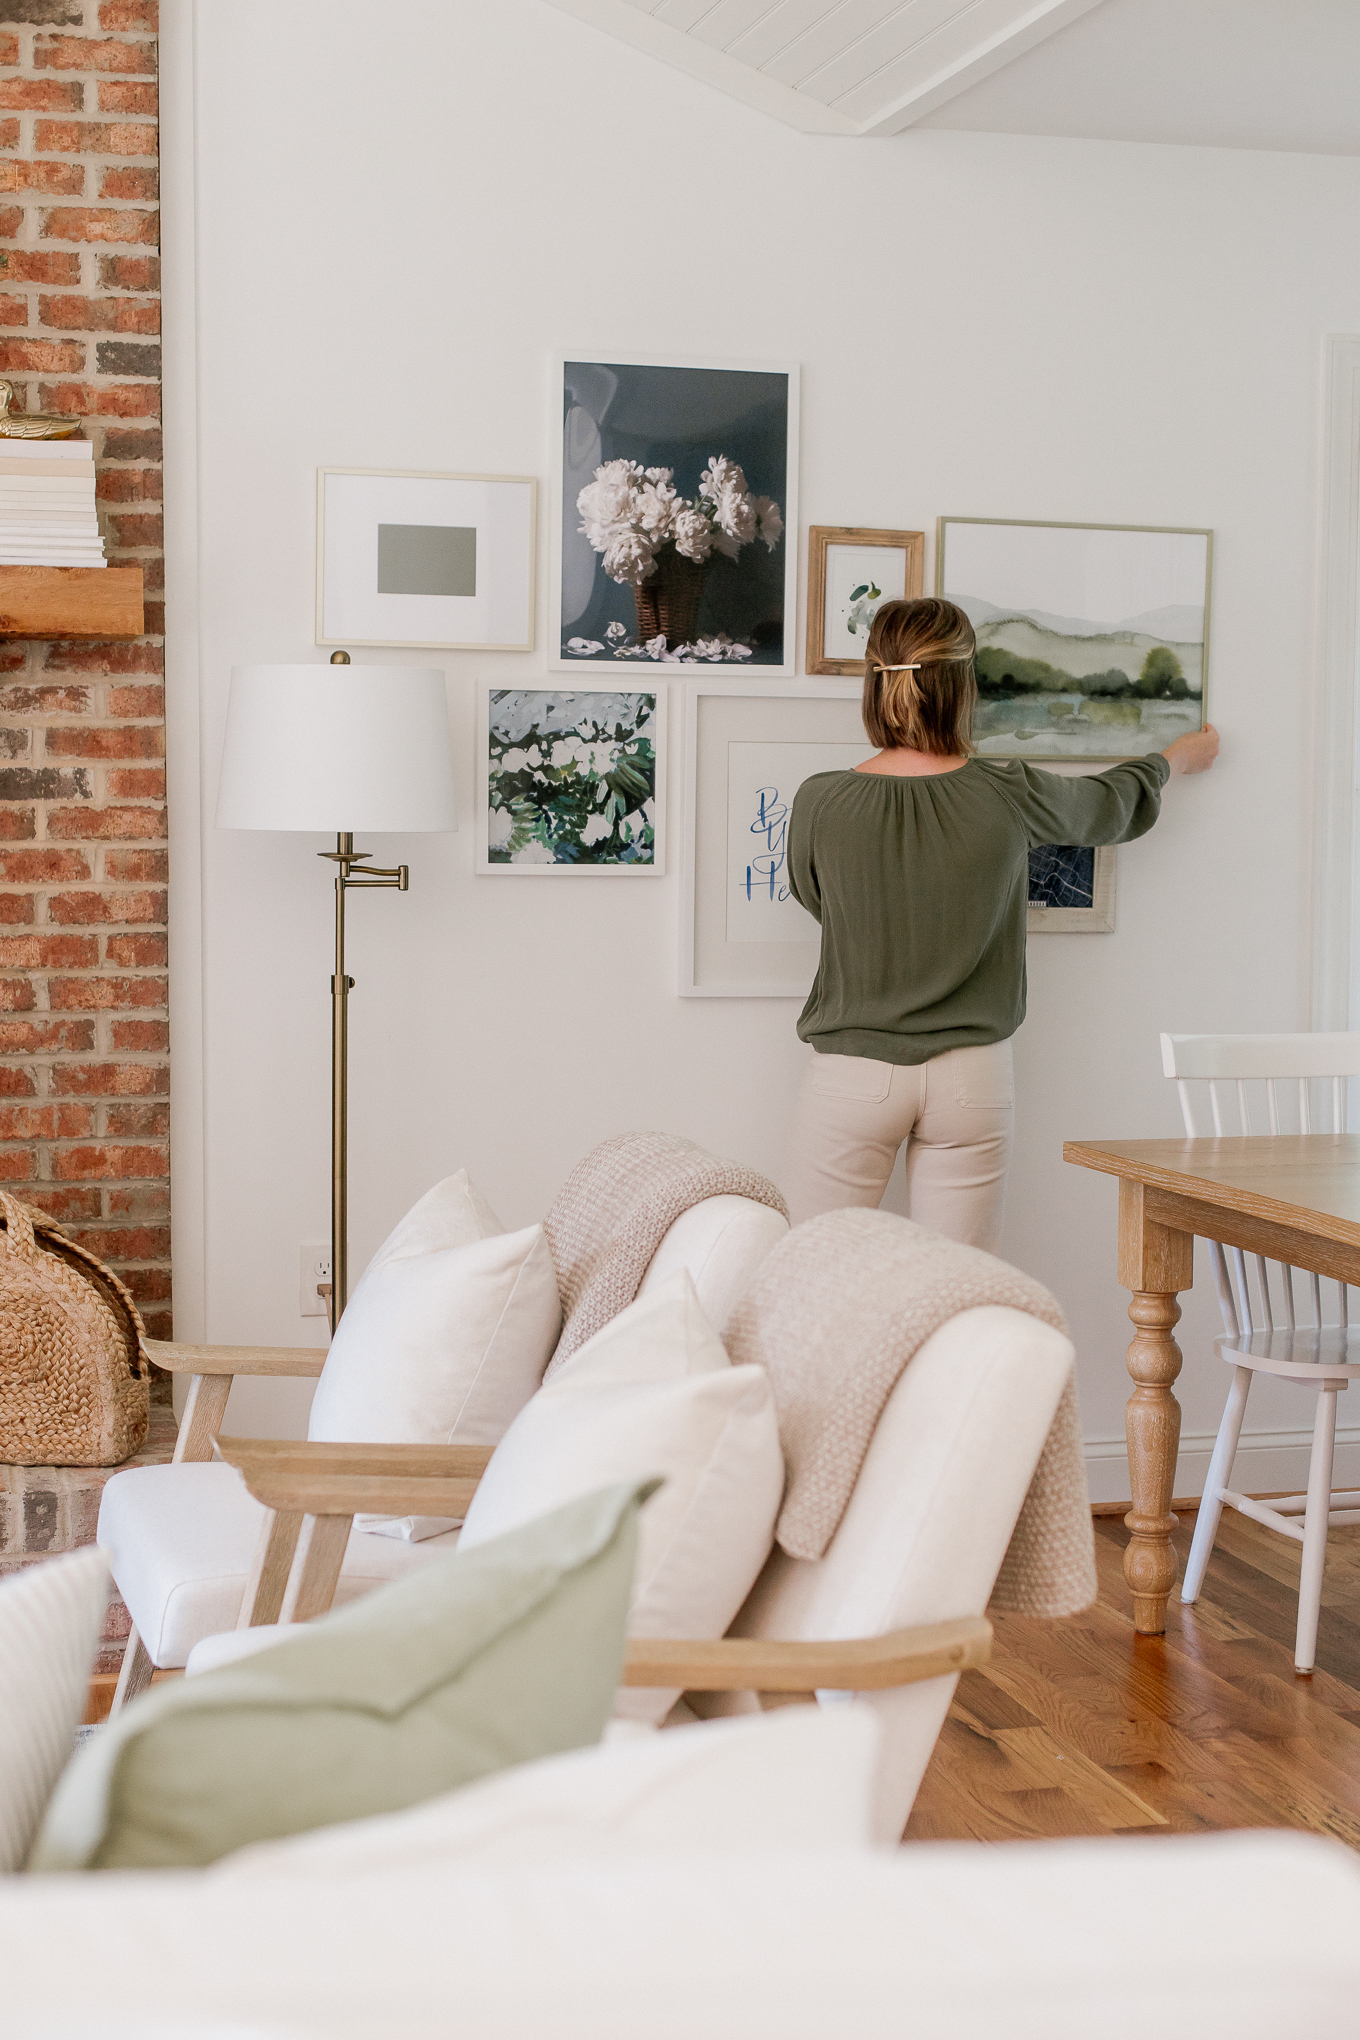
If you missed it, I recently shared the reveal of our gallery wall. Along with tips to creating the ultimate gallery wall and how to decorate the space around your gallery wall. A gallery wall can be quite the undertaking – especially if you’re doing on a larger scale. But even the smaller ones can become overwhelming. Deciding on the gallery wall layout, the color scheme/style, and the pieces to include can all seem like too much! If you’re currently in that boat OR have been in the past and given up on the project, I am here to help!
While the post I shared recently included tips for creating the ultimate gallery wall, I wanted to dive further into deciding on a layout/mapping it out and how the heck to choose cohesive pieces for the space. Additionally, dive into how we decided on the layout we did and the artwork we included.
Our Gallery Wall Layout & Artwork
The Gallery Wall Layout
The layout of your gallery is probably the most overwhelming step. However, it does not have to be! It just requires lots of planning and some time. The first step is to spend some time on Pinterest reviewing the wide variety of layout options. Such as square or symmetrical, asymmetrical, climbing, baseline, or on a shelf. It is important to find a layout that you love but also works for the space where you will be creating the gallery wall – in your home. For our gallery wall, I searched “gallery wall living room and gallery wall family room”. As well as “large wall gallery wall” – since our wall is on the larger side.
If you find a layout you absolutely love – perfect! But if you find two and cannot decide between them – don’t fret – I have a solution! Grab a roll of kraft paper or brown paper bags from the grocery store and cut them to match the size of frames in the gallery wall layout.
Now tape these pieces to your wall – laid out exactly how you plan to hang the gallery wall. Leave the kraft paper up for a couple of days and see how you like that layout. If you have another option you’re deciding between switch up the layout after two-three days and sit on that one for a couple of days as well.
Once you’ve decided you love the layout measure and remeasure to make sure everything is exactly how you want it – before holes are made! With the kraft paper in place, simply measure where your nail needs to go in based off the backing of your frame and hammer your nail in. Once you place your frame/artwork on the nail you can pull down on the kraft paper and remove it from the wall. My recommendation is to start with the center piece and go out. If you’re doing rows, simply start at one end or the top/bottom.
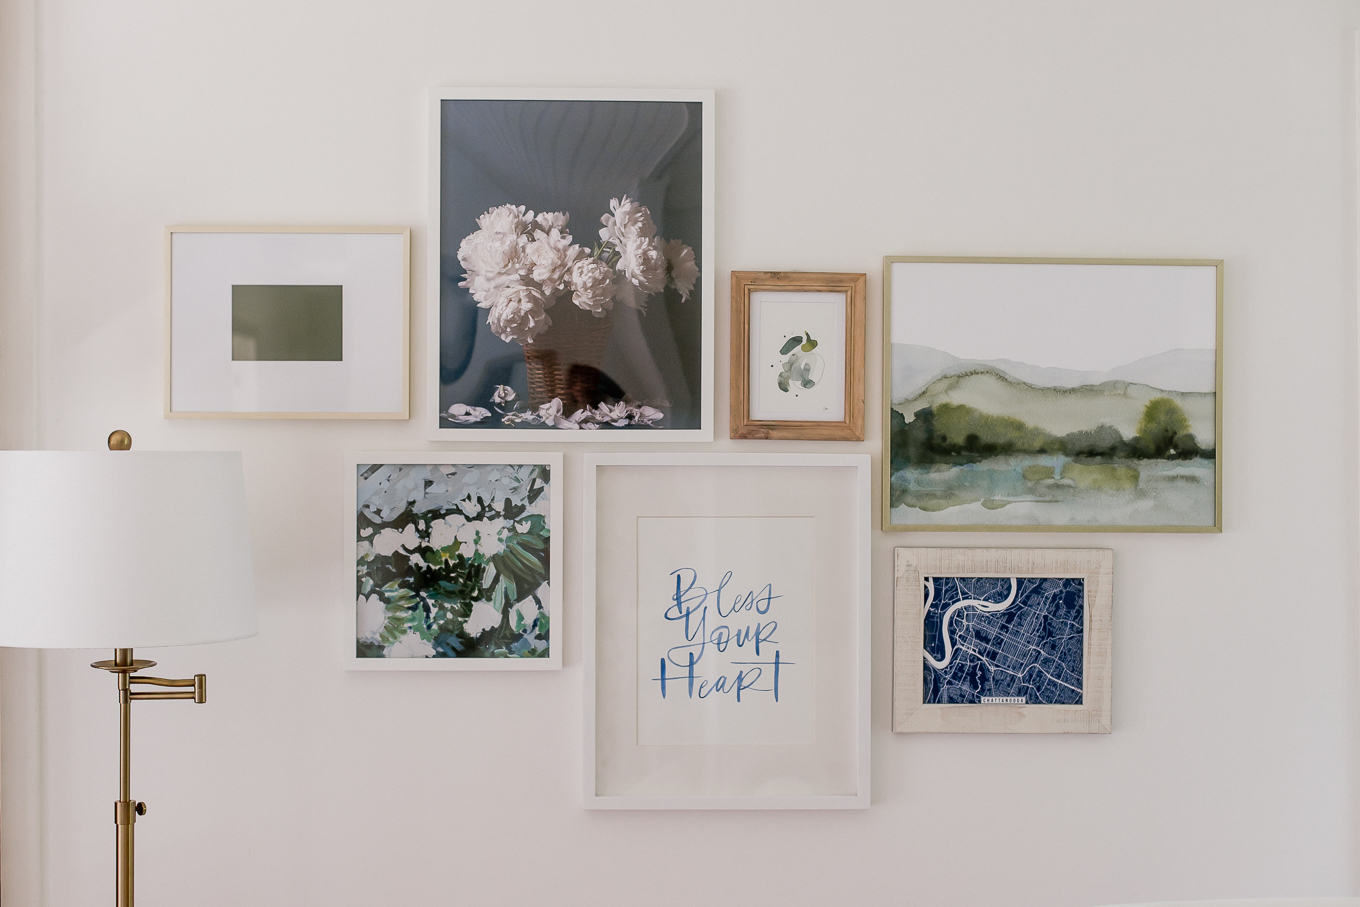
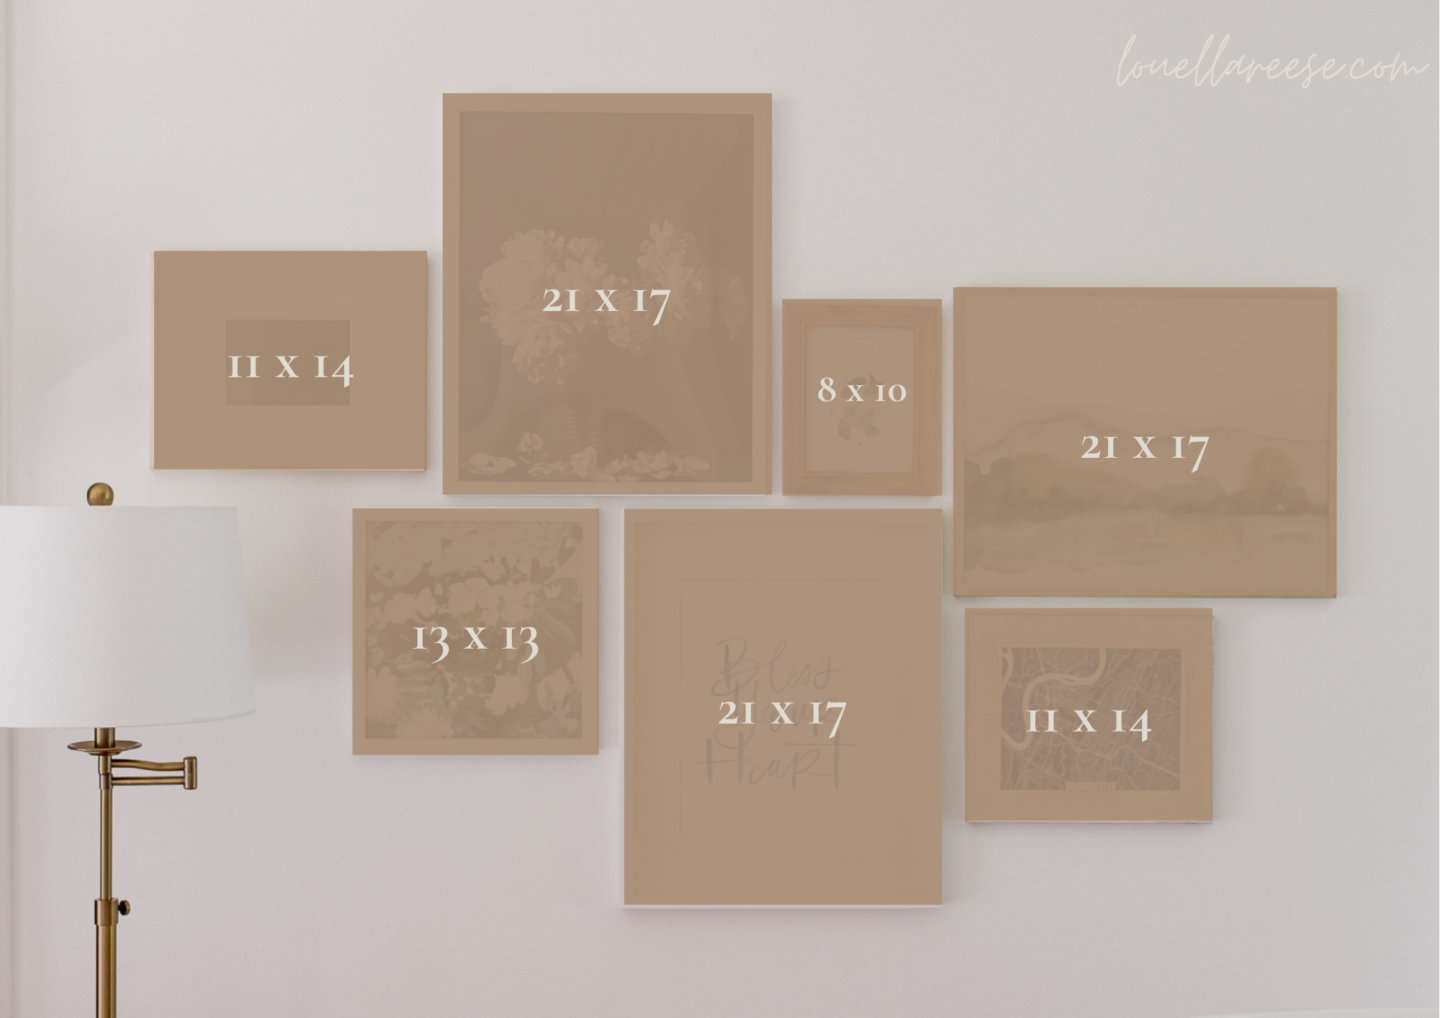
Here is the layout of our gallery wall and below that is the frame size for each frame we used…
The Gallery Wall Artwork
Selecting the artwork is definitely the most exciting part of creating a gallery wall! Although I will say it can take some serious time to find pieces you love that coordinate well together. But in the end – it is so worth the time!
The layout you selected should determine how many pieces of artwork you will need for your gallery wall. As you see above with our layout we needed seven pieces of artwork. Once you have the number down I recommend deciding on a theme and/or or color scheme. Do you want every piece to have a specific color incorporated in it or rather a color palette for all pieces. Or not specific colors but a specific theme. A few theme ideas – florals, animals, black & white, paintings, landscapes, vintage, abstract, family portraits.
If you’re using art pieces vs. family/friend/wedding photographs it is easiest to start with one piece you really love and build around that. Either choose a specific color from the piece to build the rest of the gallery wall off of, select a color palette around it, or go the theme route.
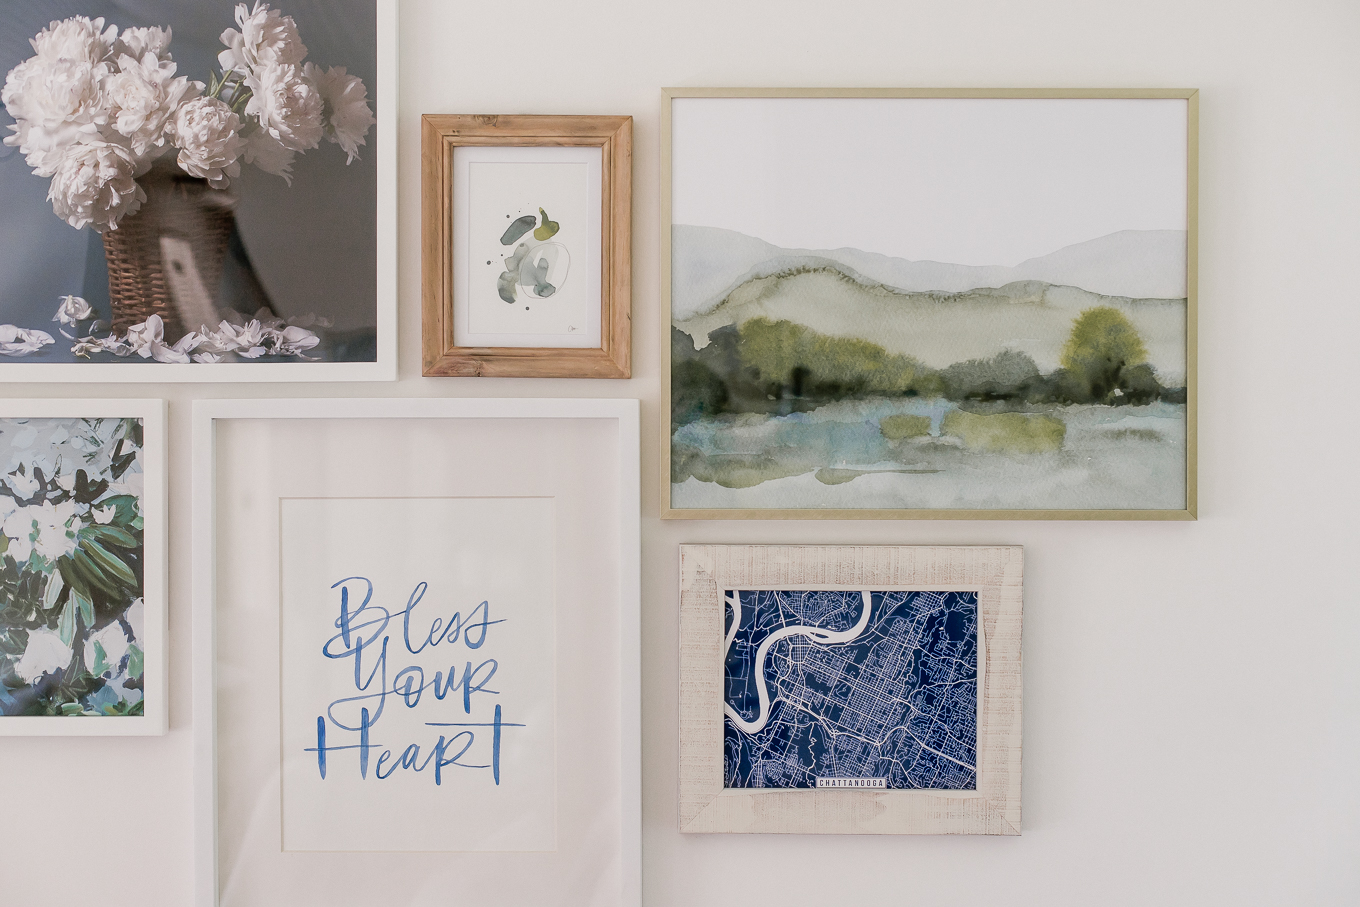
We opted to go the color scheme route with greens, blues, and white. The gallery wall was built around the Bless Your Heart watercolor which was created by one of our sweet friends as a wedding gift. From there I knew I wanted the subjects of most pieces to be more natural – landscapes and flowers. So that is exactly what I searched for on Etsy while narrowing down the search by colors – green and blue.
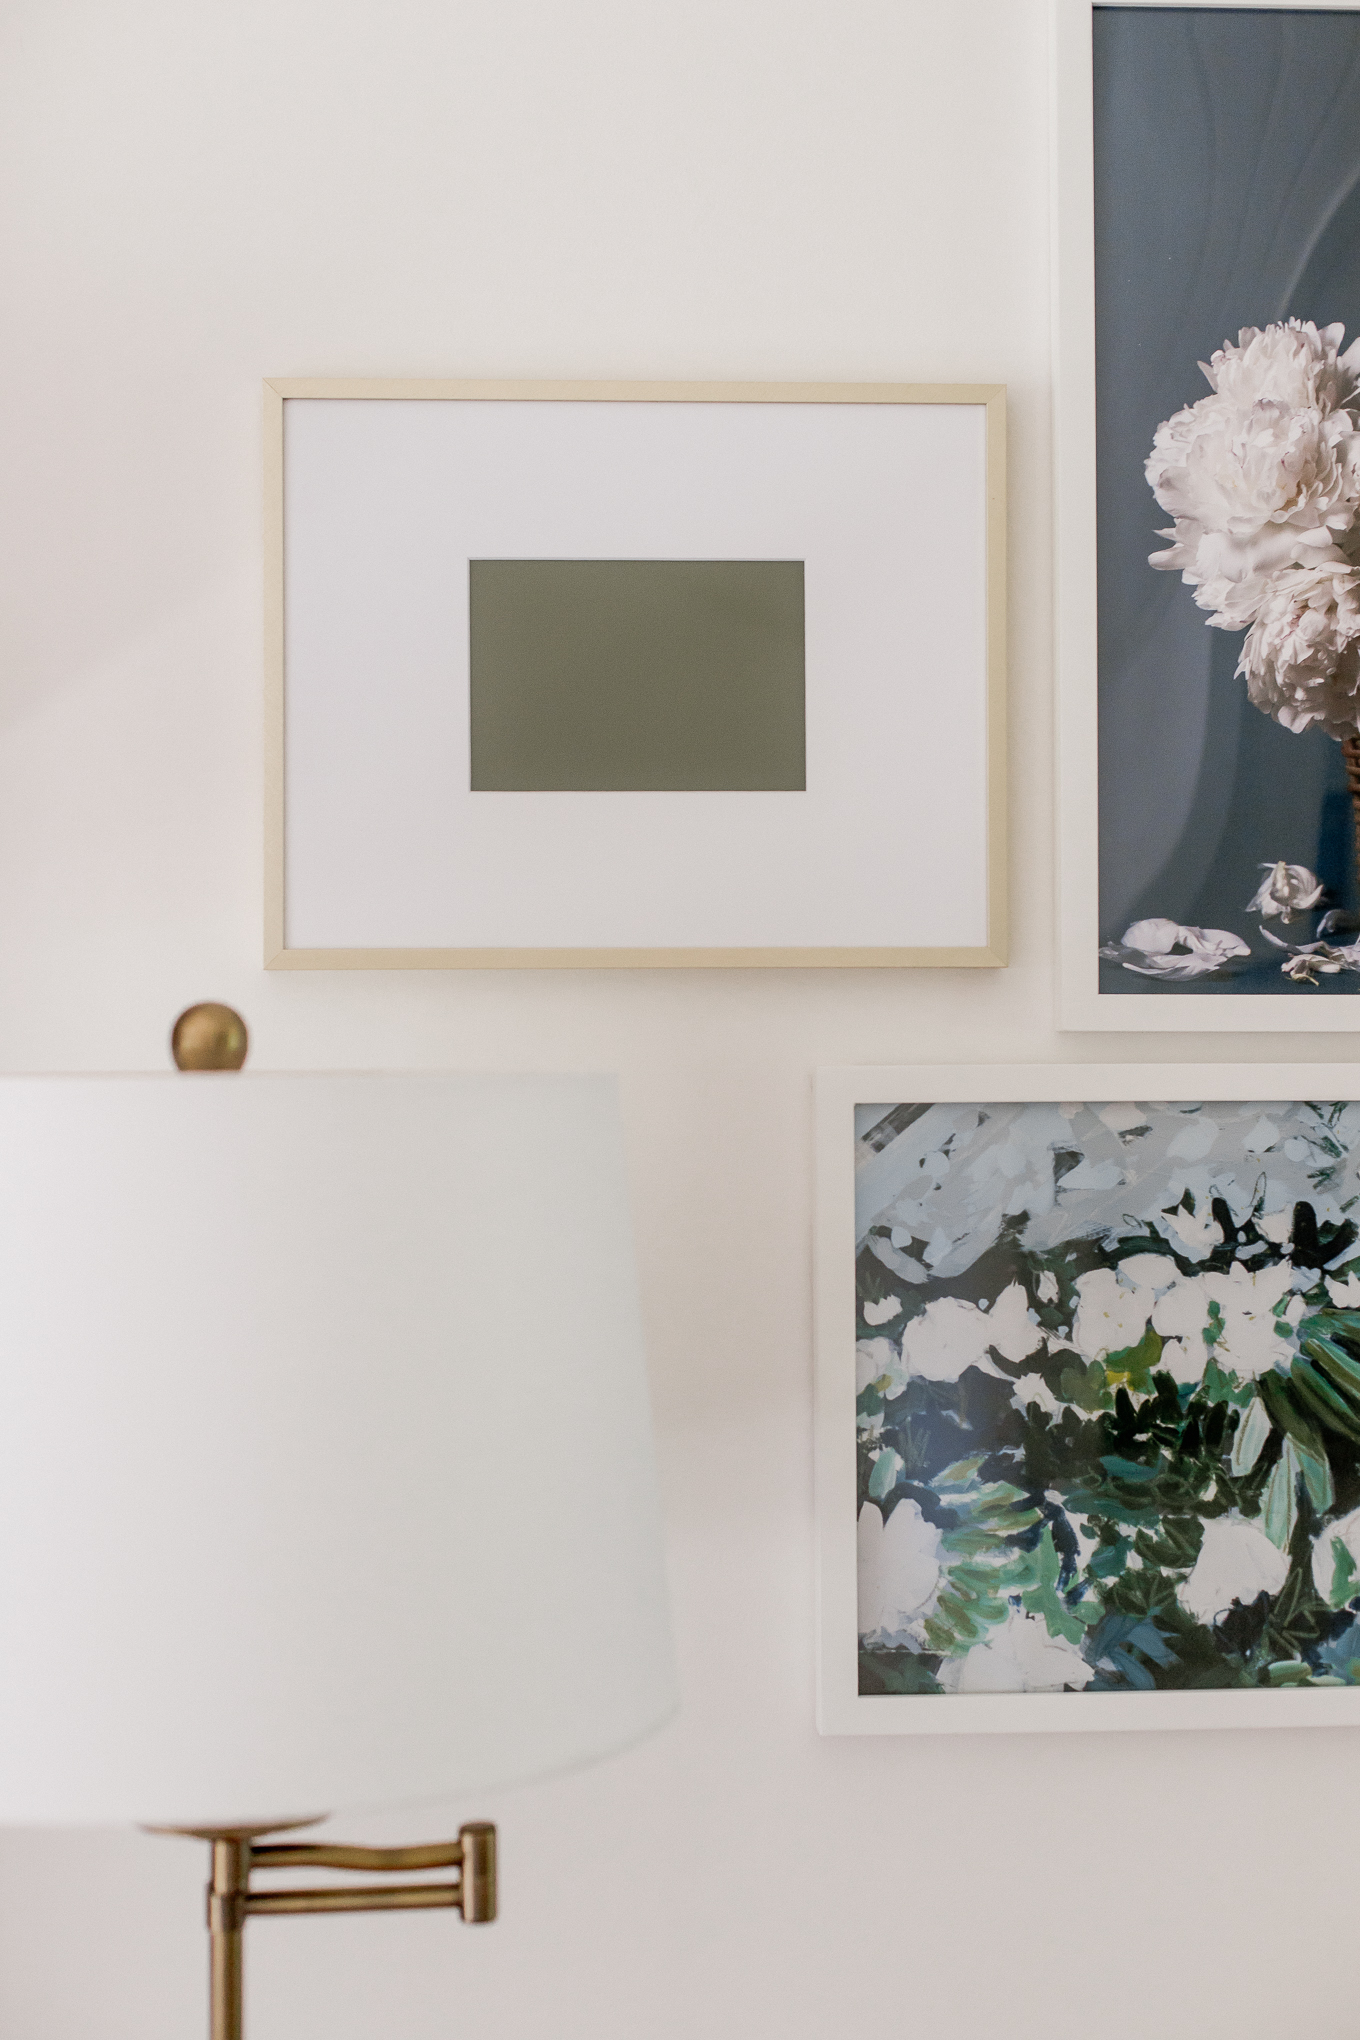
After I found our three main pieces I found the funky abstract piece that I completely fell in love with! Thought it was fun and added a little spunk to the wall. That left me needing only two more pieces – I decided something with meaning would be good to add. That is where the Chattanooga Map print comes in. Joshua and I visited Chattanooga for our second anniversary and completely fell in love! With only one piece needed after that I was stuck! Everything was too busy, didn’t go just right with everything else, or I simply didn’t like it. Call it perfect timing, call it crazy BUT around the time we were creating this gallery wall I was ordering paint samples from samplize to test out paint colors for a couple of accent walls. Several didn’t work out in the space and I randomly decided to hold them up to the gallery wall. One matched perfectly and added a modern touch to the wall. So our final completely green piece is simply a paint sample stuck to a piece of paper. Sometimes you have to improvise, right?
White Peonies Print | Green Abstract Painting | Green Landscape Print
Green, Blue, and White Floral Painting | Bless Your Heart Watercolor (custom made) | Chattanooga, TN Map Print
The Gallery Wall Frames
Frames can be a super simple decision or a little bit of a challenge. Just depends if you plan to use all of the same frame (in the same size or varying sizes) or if you want a mix of frames. Obviously same frame is incredibly easy! Also a great route to go if you’re wanting a super clean, cohesive look.
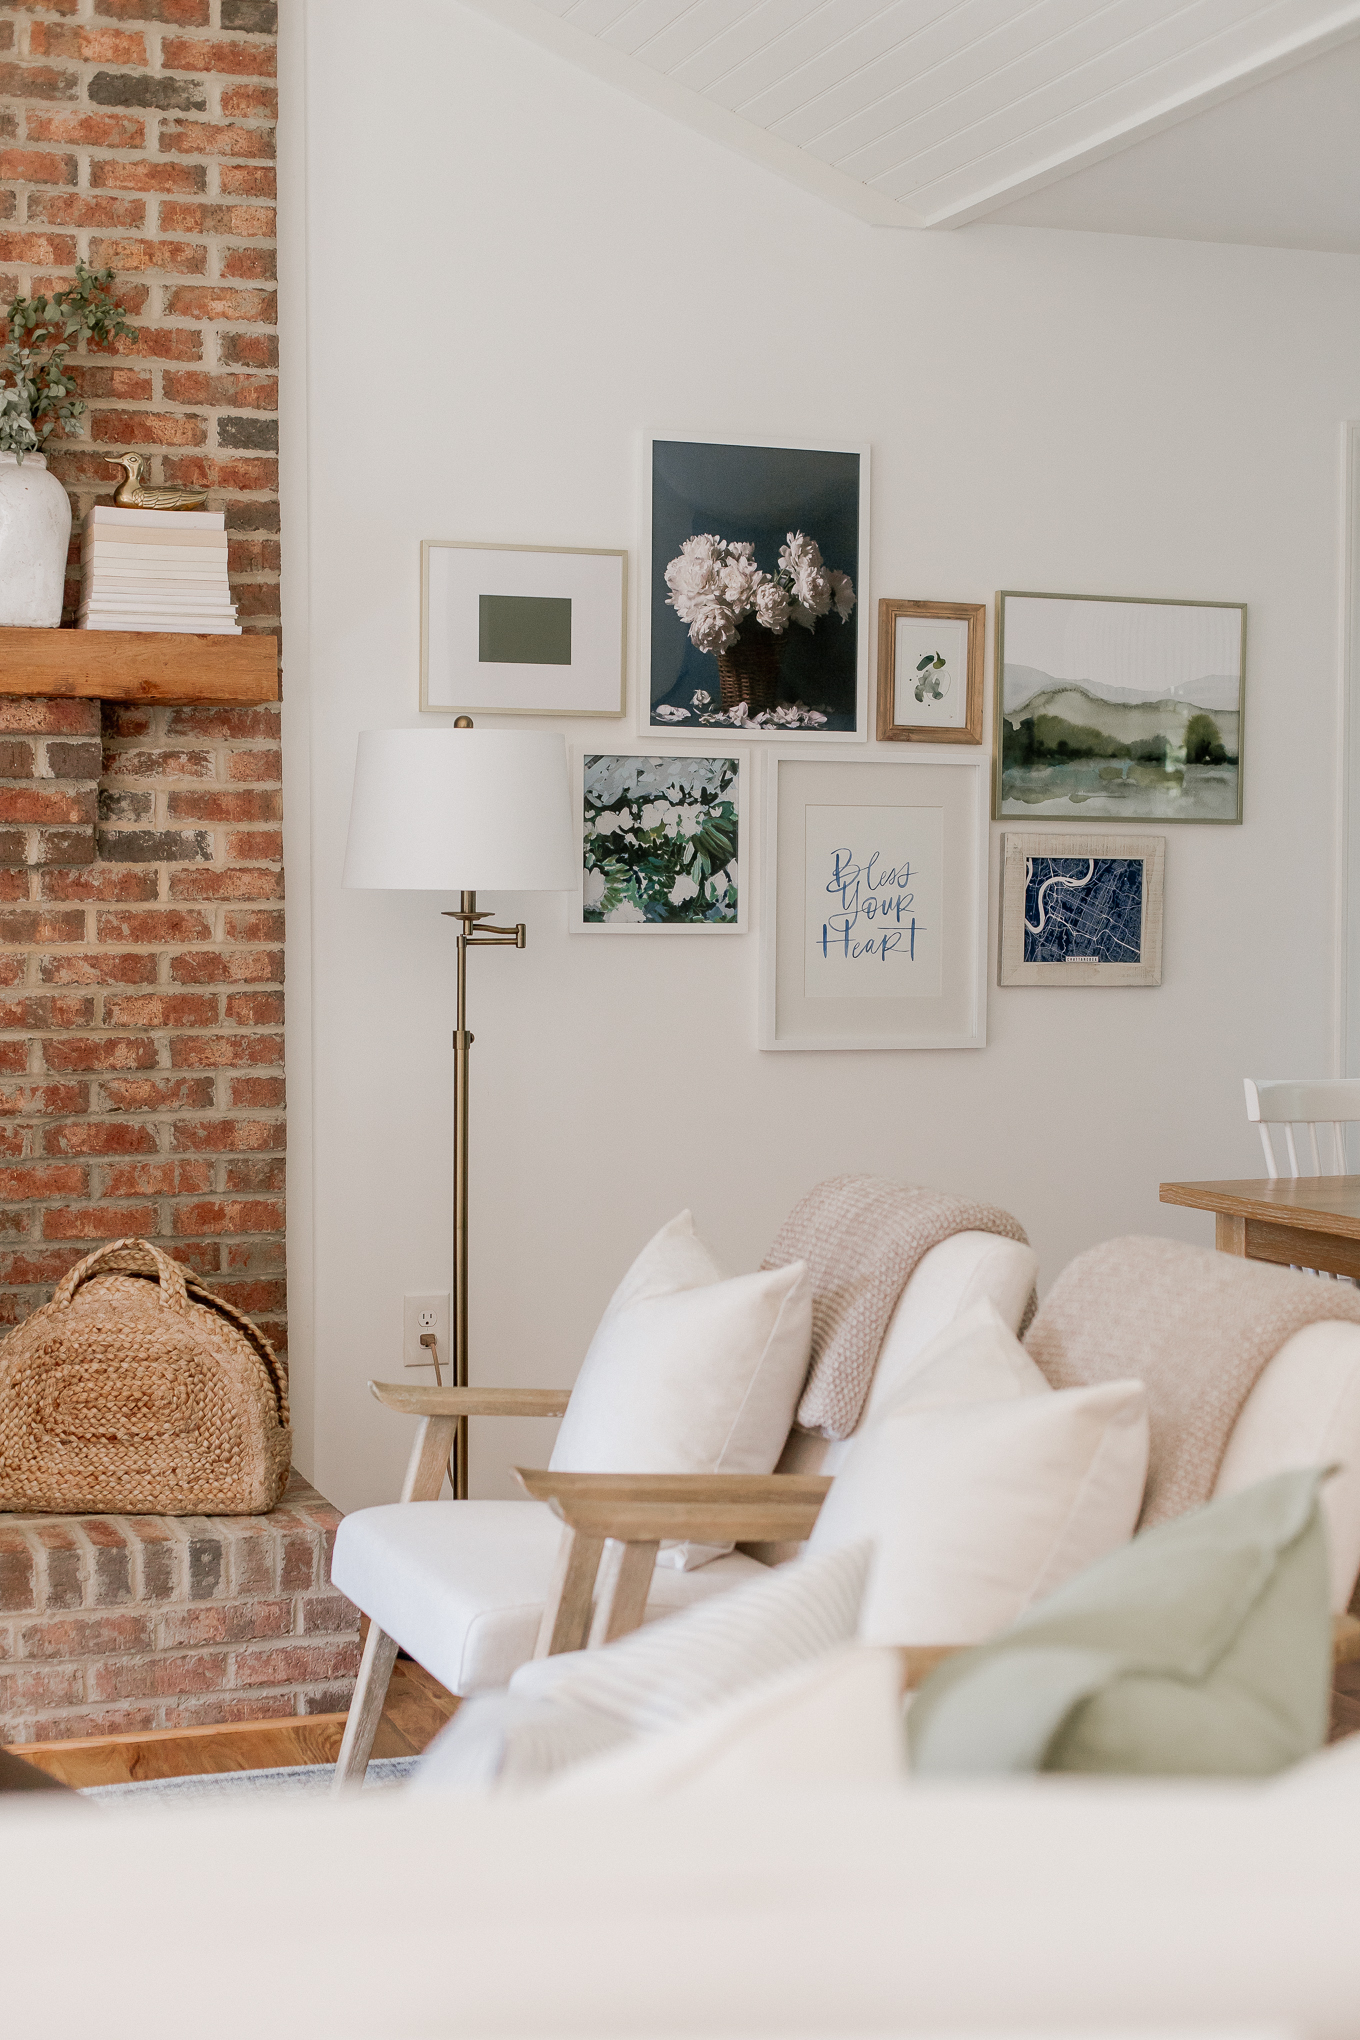
If you’re wanting a mix of frames that can take some time to decide on and find the right frames. My recommendation is to look around your room – see what colors and metals you have and include those. Either one of each or a metal and two colors – these should be neutral colors like white, gray, black, or brown.
We wanted a mix so we included white (like our walls) and gold (like the fixtures and decor). I do actually plan to paint the gold frames to be more brass instead of yellow gold as that’s the metal we have ended up incorporating more in the space. We also added two wood frames. A white wash and a bare natural one – they added the cottage vibe I absolutely love.
Gold Metal Frames | Matte White Wood Frames | similar Wood Frame | Whitewashed Wood Frame
Shop Our Gallery Wall

Laying it out is so helpful for balancing both size and colors! When I put mine up, it was definitely a process lol! A fun process 😉
Lizzie
http://www.lizzieinlace.com
I love the mix of prints, frames, and layout. It looks so good!!
-Morgan
the HER chronicles [] http://theherchronicles.com
Wowowow love the style of your home!!
This gallery wall is so cute! I would love to copy this layout for my own wall!
Kileen
cute & little
A very balanced result. Thanks for the ideas!
aw thank you lady!
xo Laura Leigh
I love how in-depth and helpful this post is. I’ve been planning to put up a new gallery wall in my office, but haven’t determined what it will look like yet. Good tip with the paper to see what it will look like before actually hanging the prints!
This is very impressive. I like your style
aw thank you gal!
xo Laura Leigh
I think gallery walls always make an interesting focal point in a space. Love how it came out in yours! xoxo, Sarah
Your gallery wall looks amazing!! Bookmarked your how-to post and may do this same layout at the top of our stairs. It’s been almost a year in our new home and I STILL don’t have any pictures on the walls, just in frames lol. I need to get on it!
I love how your gallery wall turned out! It really helped pull the room together!
http://www.rdsobsessions.com
Ok your space is AMAZING! I love love love what you did with the gallery wall!
Dana | It’s Casual Blog
I love the mixing and matching of frame colors. Adds great depth and texture!
I just recently did a gallery wall in my dining room using photos, I had such a hard time picking out matching prints!
I love how this wall turned out. It looks so good! I want to do a gallery wall in our bedroom.
I am so obsessed with how your gallery wall turned out! It looks so good.
Rachel
http://www.hello-her.com