
First off, what is board and batten? Board and batten is a type of interior paneling that has alternating wide boards and narrow wooden strips, called “battens.” In newer homes the need to add the board isn’t always necessary as walls are smooth and on the straighter side. Therefore, you can often get away with simply adding the batten part of board and batten. Which is exactly what I did. If you are in an older home, the board portion is typically necessary to create a smooth, even surface.
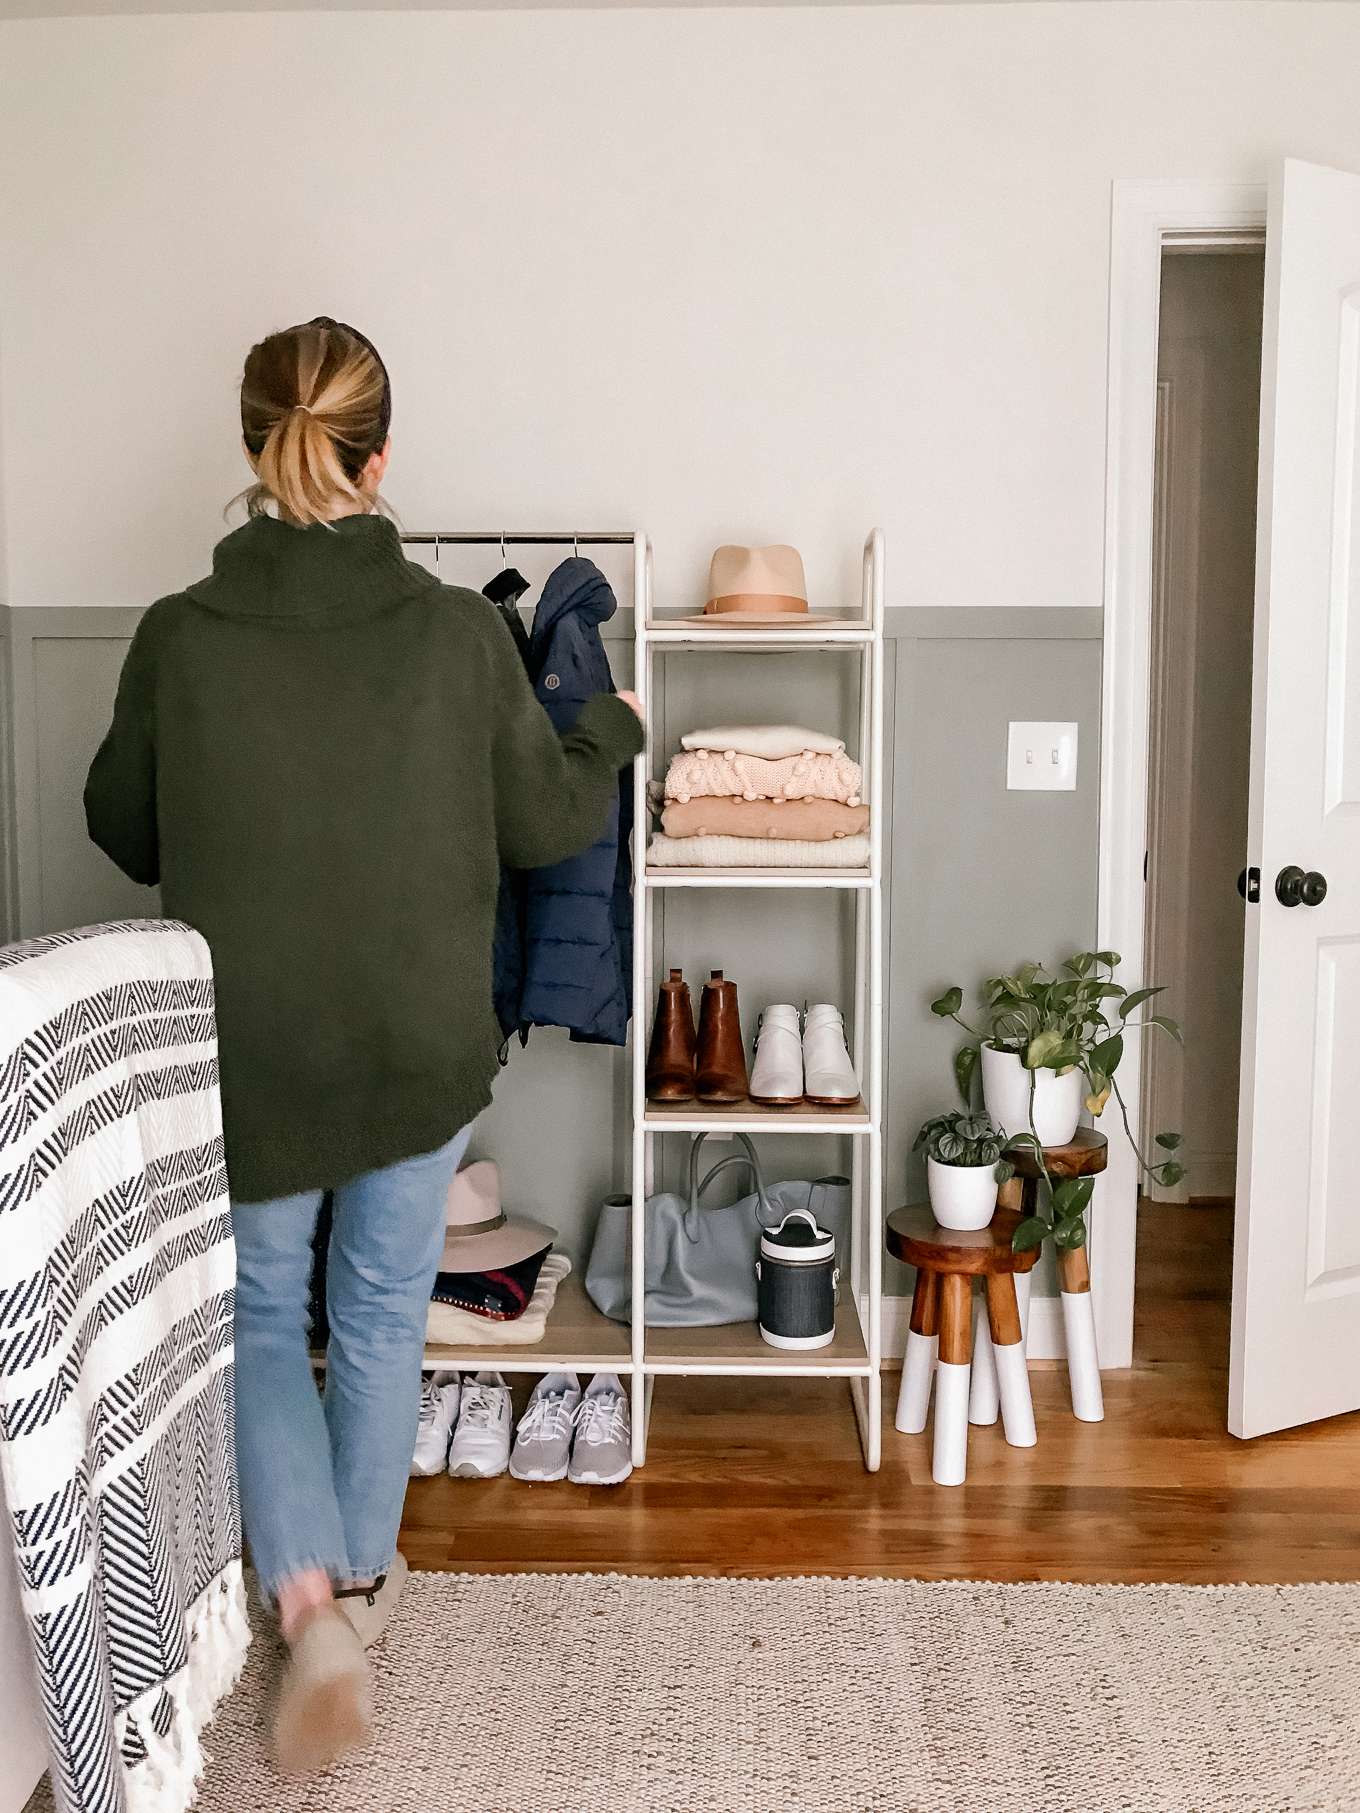
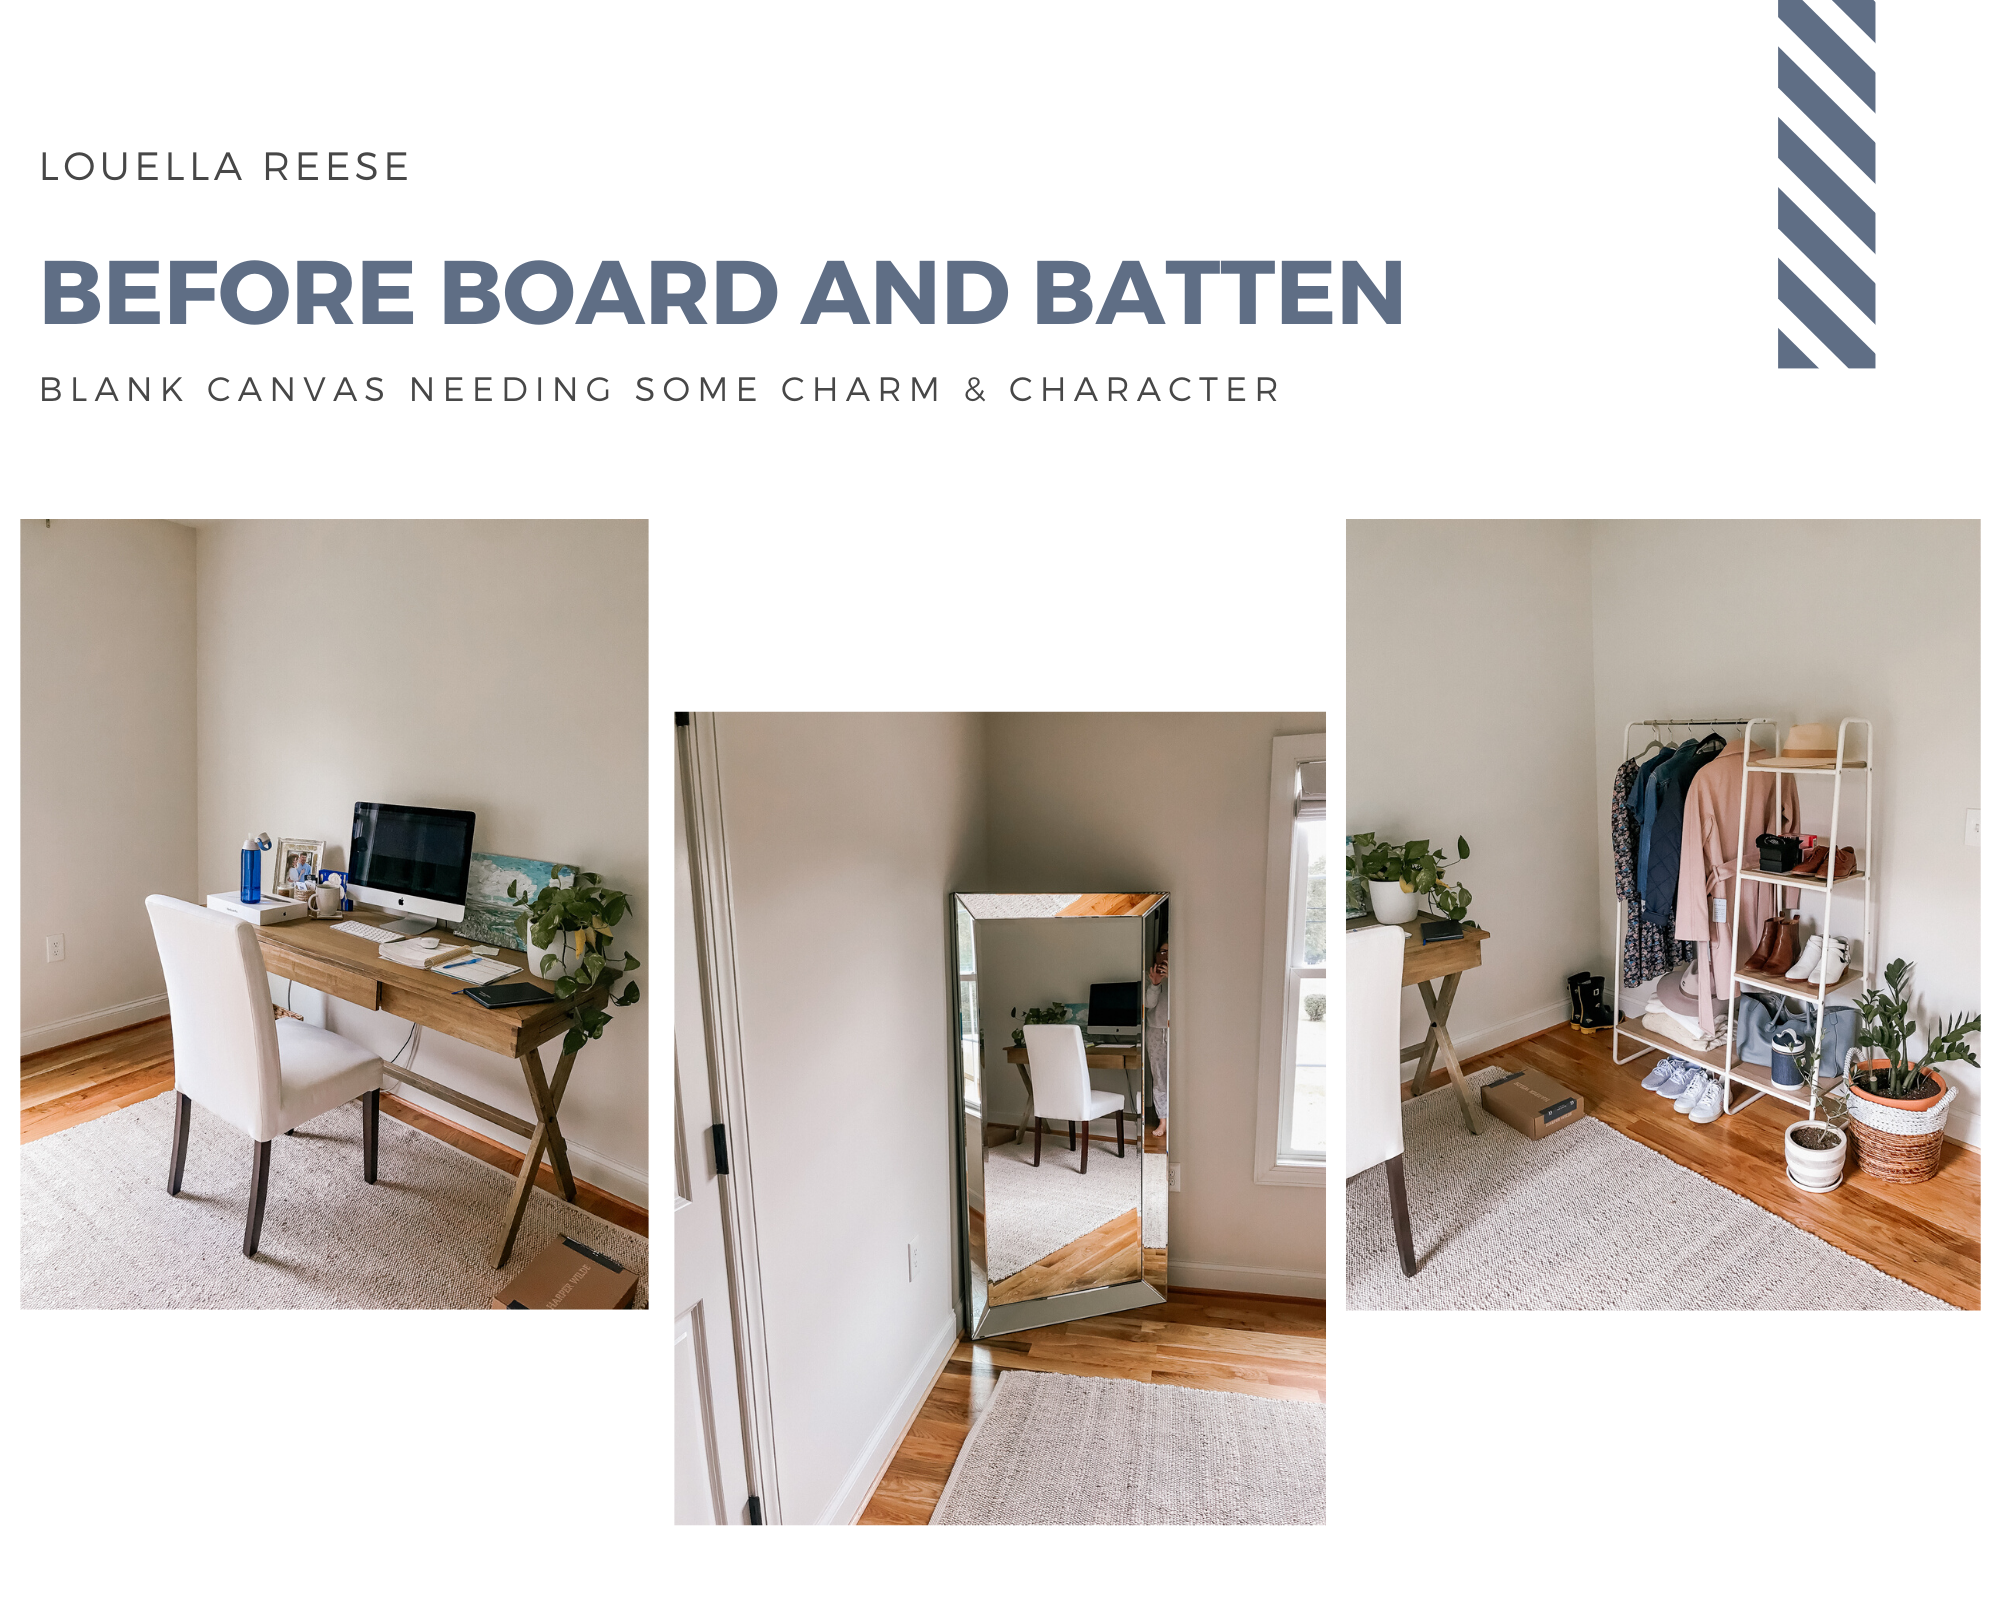
Now, why add board and batten? The paneling adds a great amount of charm and can truly transform a space! Additionally, the paneling provides the farmhouse feel that just about everyone is after. Thank you Joanna Gaines! And I was one of those people! After pining countless spaces that included board and batten I was determined to make it my first DIY in our new home. I decided on my office as the perfect space to add board and batten. It is on the smaller side and was quite the blank canvas, so something was definitely needed!
I read lots and lots and LOTS of tutorials on board and batten before making any moves. I wanted the end result to be perfection and for the process to go as smoothly as possible. If you follow me on instagram stories, you know that didn’t end up being the case. So here I am today to share what I wish I knew before starting board and batten…even after reading ALL of those tutorials. As well as share the finished product, what I used, and what I did LOVE about the project!
What I wish I knew before starting board and batten
1. Read multiple tutorials but only follow one
Several of the tutorials I read stated to read multiple tutorials and follow the parts that work best for you. They said every project is a little different so it’s best to pick and choose from each tutorial was relates to your project. While that is true on SOME accounts, that’s not necessarily a good way to go. Everyone does board and batten a little differently and if you follow multiple tutorials you’re going to be doing these in different order than each one. Therefore, you’ll end up confused, finished product may not be exactly what you wanted/like, and may end up spending more on materials to complete the project.
Lesson learned: stick to ONE tutorial from start to finish but do read multiple tutorials to find out which one best matches your space + expertise level.
2. Inspect your wood BEFORE having it cut
One thing I did know and is a very important piece of information – wood needs time to acclimate to your home. Wood shrinks/expands based on humidity so the humidity of your home is going to be different than Lowes or Home Depot or wherever you buy your wood from. Therefore, it needs to sit in your home for 5-7 days to acclimate to your home’s humidity. This will keep it from doing so while attached to your wall – which could result in boards bending, pulling away from the wall, and curving.
I did not realize that you needed to inspect your wood prior to having it cut at your improvement store of choice (or at home). Wood in stores may already have bends and curves that cause the wood to not sit straight against your wall. You want your wood to be as straight as possible so it easily aligns with the walls and stays put! Additionally, it may have breaks/slices or knots that make it unusable. So be on the lookout for those as well.
Lesson learned: intensely inspecting your wood before having it cut and purchasing is very necessary and will save you a lot of time in the long run. As well as money!
3. Paint everything at once
Several of the tutorials I read conflicting pieces of advice when it came time to paint. Some tutorials suggested painting your “board” part (your wall) prior to attaching your battens while others said to wait until after the boards were attached. And others said to paint your battens prior to attaching them to the wall while some said to wait as you will be nailing, spackling, and sanding. See, lots of conflicting advice!
I painted the wall first and then waited to paint everything else once the battens were attached, spackled, and sanded. Thankful for the latter part but wish I would have held off on painting the wall first.
Lesson learned: paint everything at once! One it will save you a lot of time. Two it will offer up cleaner lines. Three it is 100% necessary to wait until after you attach the battens, spackle, and sand them to paint the battens. Otherwise you’re creating a lot of extra work for yourself and chances are they won’t look very even!
4. Use caulk without silicone or latex
I didn’t read a single tutorial that mentioned anything about the type of caulk to get other than it being paintable. Which is VERY IMPORTANT. If it isn’t paintable your paint will bead right off of the caulk. However, getting caulk that is silicone or latex free is always a good idea. It will look better and those ingredients aren’t necessary except for outside and/or in a bathroom. But because I was so focused on getting caulk that was paintable as soon as I saw those words on a tube of caulk I picked it right up and headed to the check out.
Lesson learned: slow down and fully read before purchasing your caulk!
5. While it can be an “easy” project it is time consuming
Let me drop an honesty bomb here that NO ONE dropped in any of the tutorials I read. THIS PROJECT IS VERY TIME CONSUMING! Literally not a single tutorial I read stated that. Every single one said how quick and easy it is. And maybe it is if you’re more seasoned which I am guessing most of the people behind the tutorials are. However, several of them even stated it was a great project for a beginner. While I will agree it wasn’t incredibly hard, it did take a lot of time! There are quite a few steps…measuring, measuring again, purchasing your wood, having your wood cut (or cutting yourself), attaching the wood, spackling, caulking, sanding, priming, painting, and painting again. It is A LOT!
Lesson learned: If this is your first DIY project of this scale ask for help! This project would be much easier as a two person project. And just know it isn’t going to be a very quick and easy project, it is going to take a couple of days to a week plus depending on the time you have to dedicate to it.
What I LOVED about this project
The final product and how it transformed the room
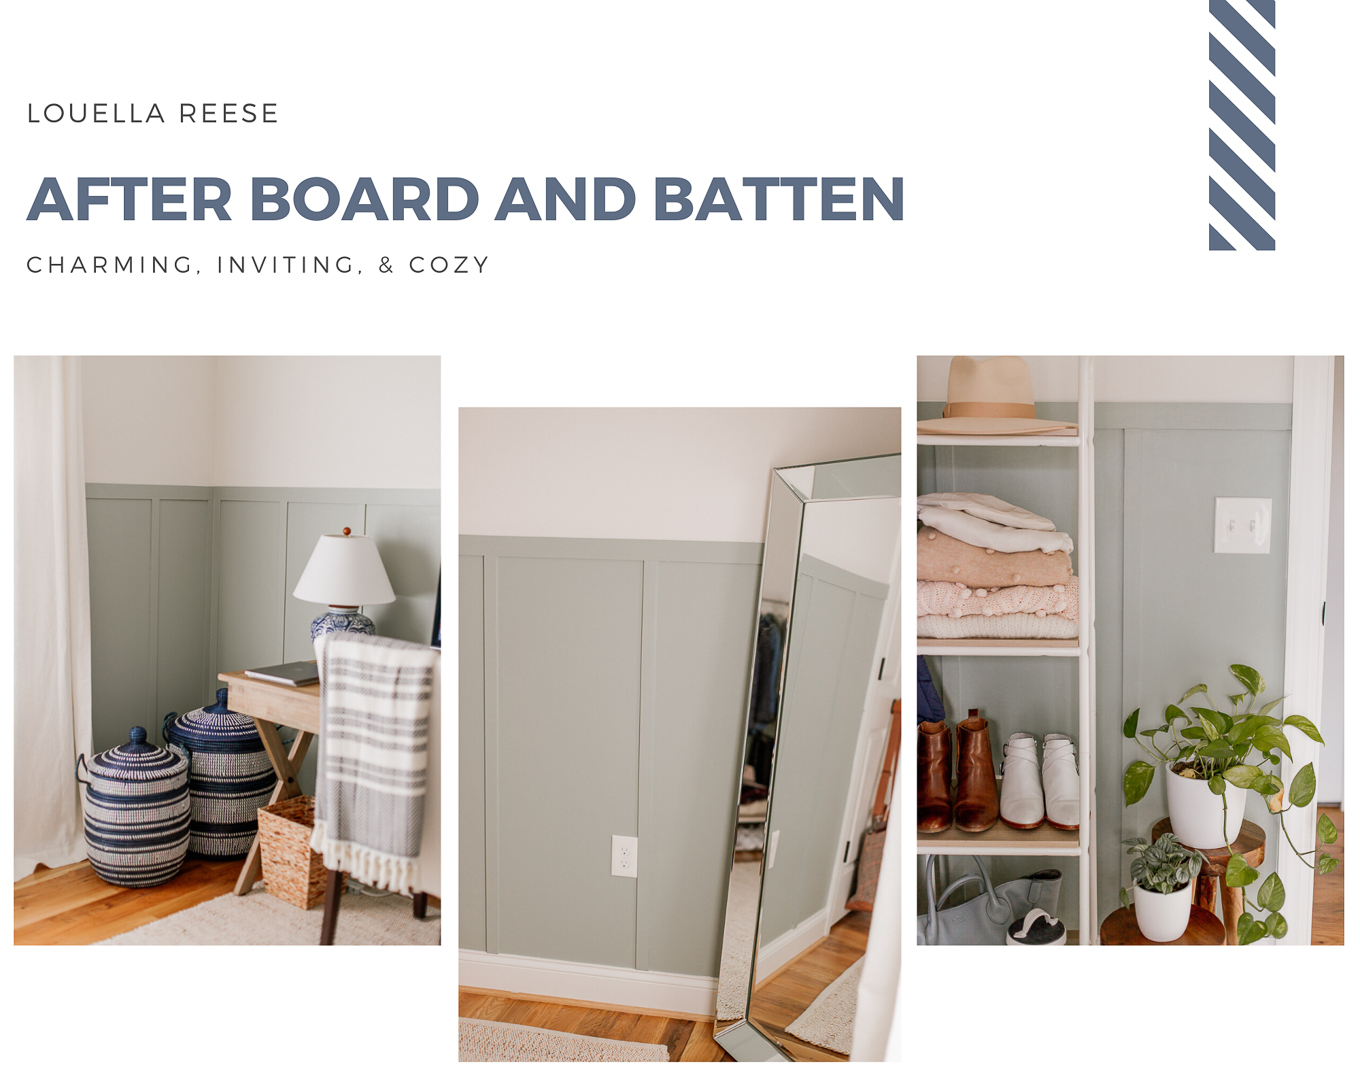
While I didn’t love the process (other than painting) I absolutely love the final product. It is still need of a little touching up here and there but the board and batten completely transforms the space. The room looks completely different and in the best way possible! The paneling provides a warm, inviting, cozy touch. Softening up the space and giving it that cottage/farmhouse feel I was after. Honestly, every time I walk into the room I smile! The space makes me happy and the board and batten is a huge part of that!
The paint I used
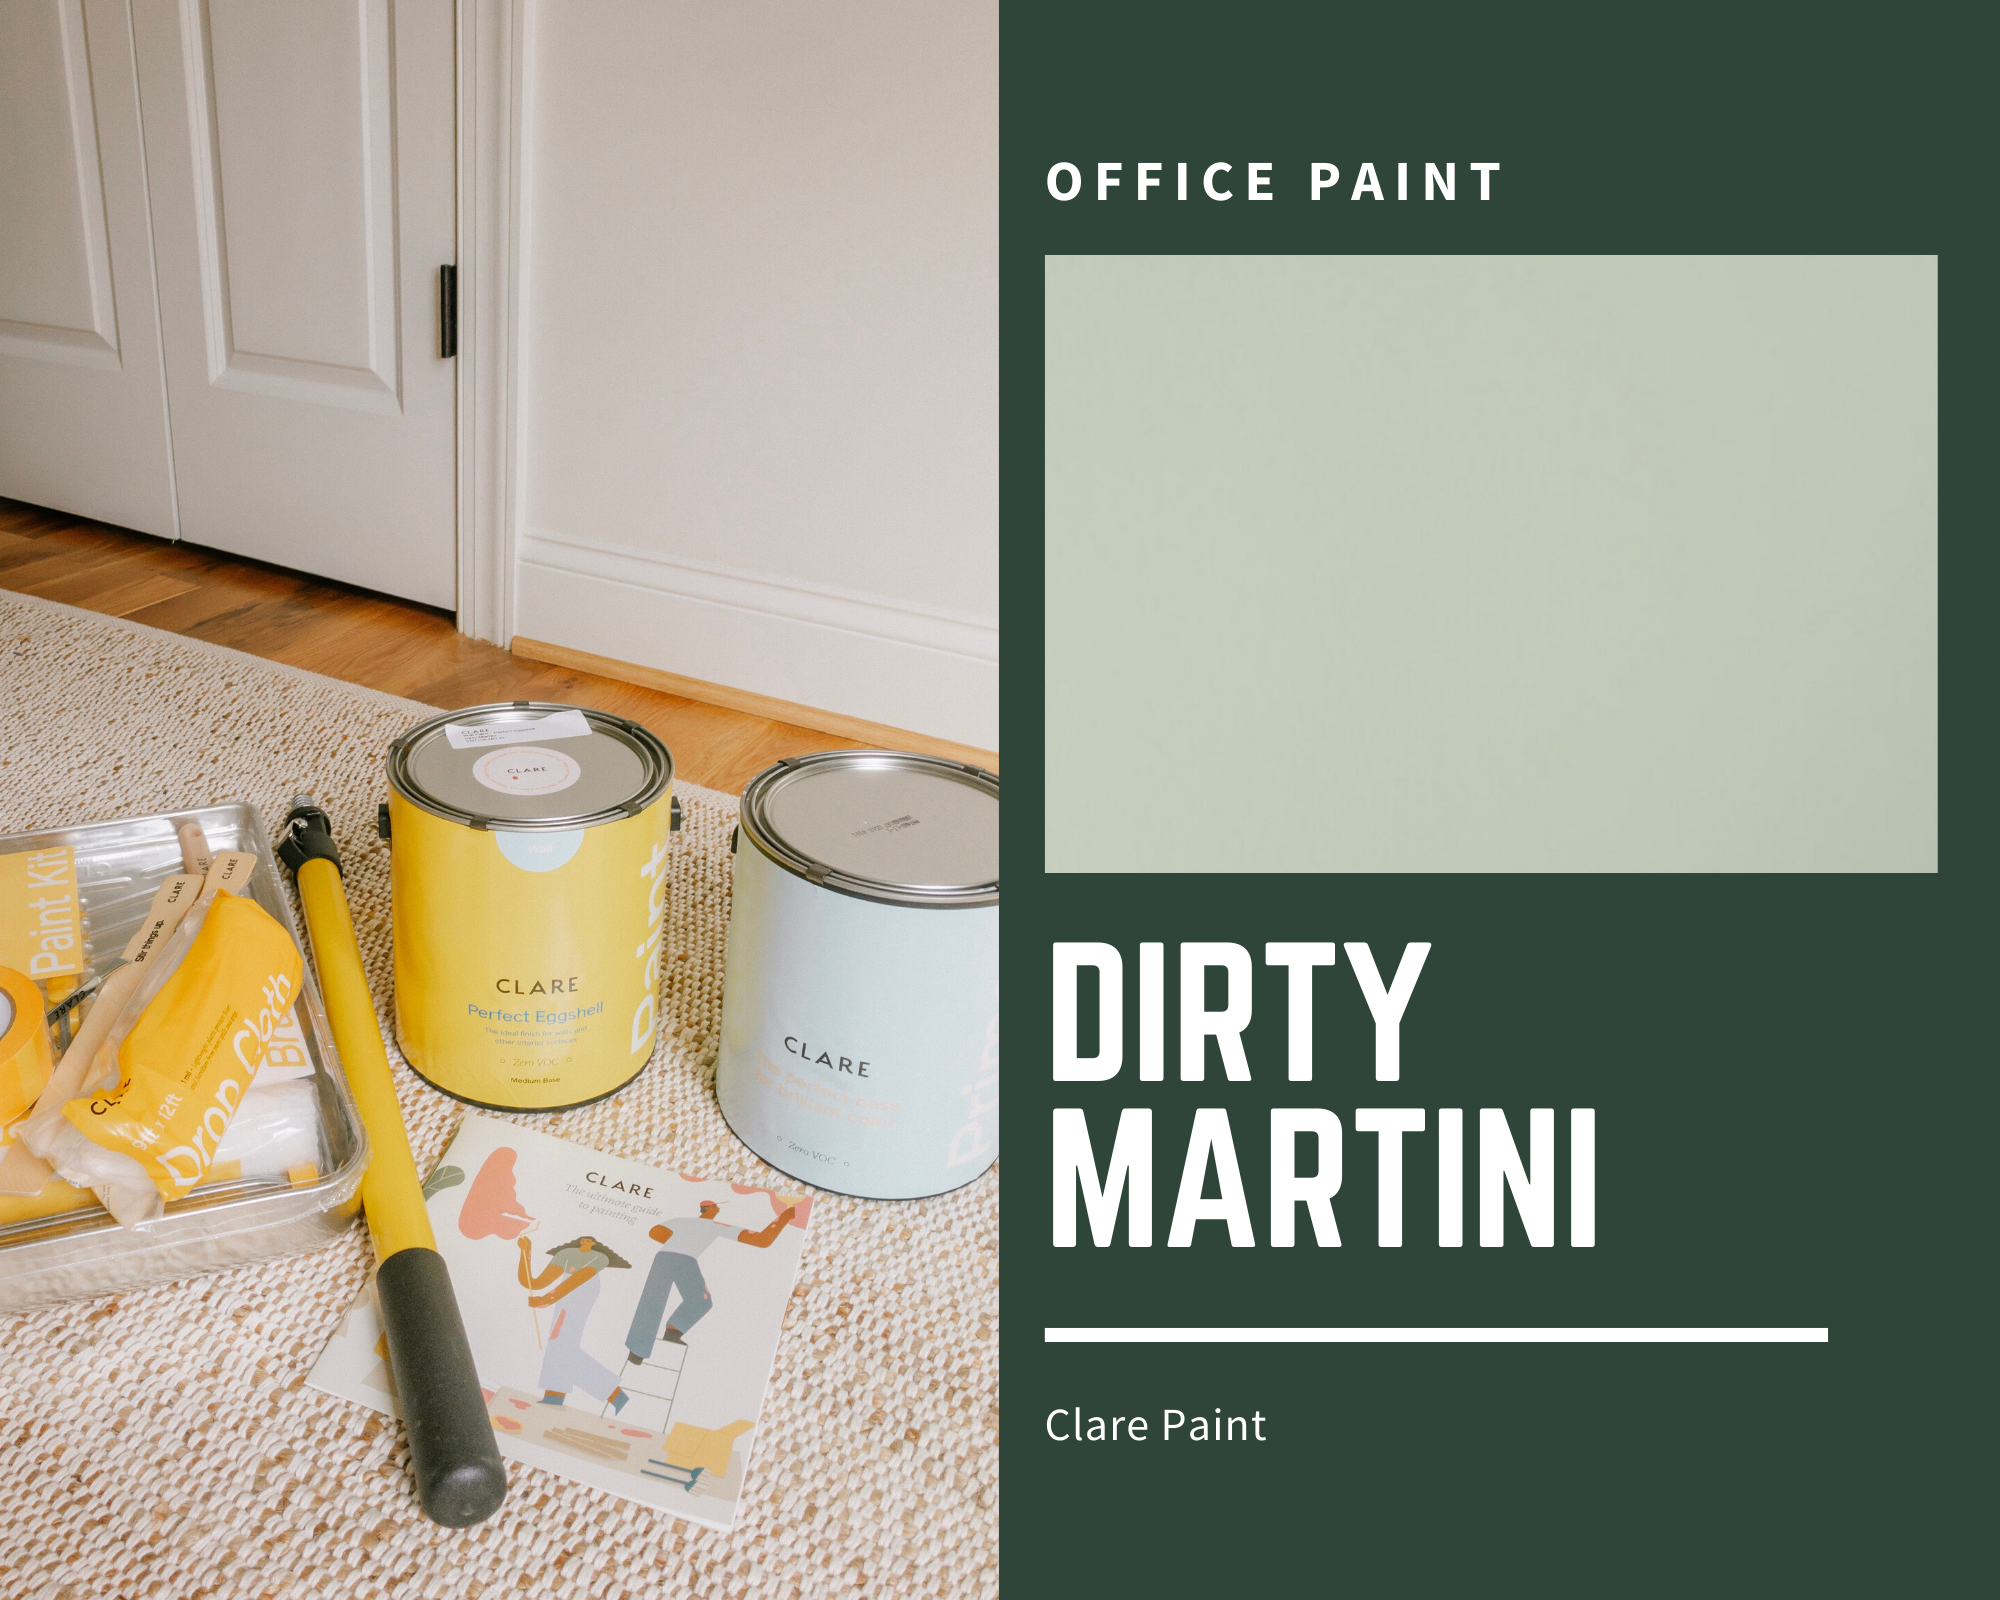
If you follow me on instagram stories you may have voted on what color I used (thank you for that). As well as the brand of paint I went with and how they are changing the paint game! Clare‘s mission is to make paint shopping easier than ever with designer-curated colors, mess-free peel and stick swatches, and premium, Zero VOC paint delivered to your door. I mean, how amazing is that?
To kick off my project I ordered three swatches from Clare – Money Moves, Dirty Martini, and Current Mood. They arrived in a couple of days in a folder with a little information about Clare and were quickly applied to my wall thanks to their peel and stick backings. After some voting by y’all and family members, I decided on Dirty Martini.
I then used their incredibly handy paint calculator to determine how much paint I needed. Once I had that figured out I placed the order for the appropriate amount of paint and primer. Y’all their primer is my favorite thing ever and I will NEVER do painting project in our home without using it. Their primer is a fast-drying, multi-surface paint primer that applies easily to conceal imperfections and block stains while providing a long-lasting bond to a variety of interior surfaces. Basically it’s a game changer and a total necessity.
To make life even easier, Clare offers painting supplies on their site. Aka they’re truly a one shop stop for painting and you don’t even have to leave your home! Total win!I used the eight piece painting set and found it had everything I needed.
Then I primed, primed again, painted, and painted again. Than stood back and smiled – I LOVE Dirty Martini! It is the prettiest green shade and y’all photos DO NOT do it justice. Several friends have stated that after seeing it on instagram stories + instagram and then seeing it in person. Oh it is a beauty!
Next on my Clare painting wish list…Goodnight Moon or Good Jeans for our guest room.
The board and batten truly add so much to the room!! This post is so thorough and the best true review on the process I’ve seen in a while. Great tip about doing your research but stick with one tutorial!
-Morgan
The HER Chronicles [] http://theherchronicle.com
Thank you Morgan! I really appreciate both compliments 🙂 I wanted to create a really great resource for newbies like me wanting to kick off DIY home projects with board and batten.
xo Laura Leigh
I love the character the board and batten added to your office space! It looks beautiful!
Rachel
http://www.hello-her.com
Thank you so much Rachel!
xo Laura Leigh
I didn’t even know Board and Batten existed until. I love how it turned out! Definitely saving this post for future reference!
http://www.rdsobsessions.com
Oh it is my obsession. I would honestly do 90% of our house in it if Joshua allowed haha. Thank you lady 🙂
xo Laura Leigh
SO many great tips!! I used to renovate houses back in the day and did quite a bit of work to one of my old homes and it was definitely a TON of excruciating trial and error!! I love how yours turned out!!
Thank you Ashley! I appreciate you sharing that – honestly makes me feel a lot better!
xo Laura Leigh
I love the way it turned out!! You offered such great advice. Also, I love the name of the paint, so cute.
Thank you so much! I really appreciate that and am glad you found it to be great advice. Isn’t it the cutest? Clare paint is just the best!
xo Laura Leigh
I think that so many people will appreciate your honest review of this process and how it worked for you! It’s great to hear about this experience for you. And the final product was beautiful!
Thank you Stephanie! I know I definitely would have appreciated it while I was doing the project haha. And thank you 🙂 so thrilled you like it!
xo Laura Leigh
It’s the first time that I read about Board and Batten. I absolutely love how it looks! It sounds complicated though. These tips are definitely helpful.
Thank you gal!! It is a little tricky/time consuming but so worth it!
xo Laura Leigh
This definitely seemed like a labor of love BUT it turned out so well and love the color you chose!!
Thanks girl friend!
xo Laura Leigh
Oh my gosh this is such a cool idea for spicing up a room! I love it!
Thank you Torey!! Definitely made a BIG difference!
xo Laura Leigh
I’m obsessed with this shade and love the way your project turned out! Will definitely keep these tips in mind 🙂
Thank you lady! Clare Paint has the prettiest colors.
xo Laura Leigh
what thickness and width did you use? Or what tutuorial did you follow? I basically want the exact same look for my office. So happy I found your blog researching this clare paint color!
to be completely honest I do not know what thickness/width I used. mainly because I just went with what worked with my baseboards so I wouldn’t have to remove them to complete the project. I did go thicker for the horizontal board as I liked the look of it. as for tutorial – this is the one I used:https://www.younghouselove.com/diy-board-and-batten/
thanks lady! so happy to have you here!
xo Laura Leigh